Monthly Archives: January 2017

Cool Wave Pansy

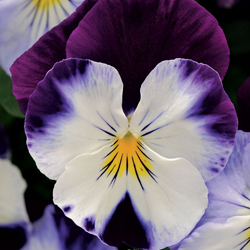
Make way for Cool Wave Pansy! New and improved, bigger and brighter, the familiar little monkey-faced pansy is the new garden darling. These flowers are even more versatile and easier than ever, and ideal for so many beautiful landscaping options.

New Pansies

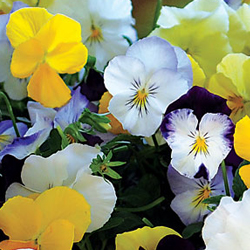
Cool Wave Pansy is a relatively new cultivar that has so much to offer. These flowers are ideal in beds among other plants and shrubs as a colorful vigorous filler, planted en masse as a blooming groundcover or planted to create amazing baskets and container arrangements with 30” of cascading floral beauty. Standing 6-8 inches tall and covered with three times as many blossoms as regular pansies, Cool Wave Pansies have flowers that glow in four new colors.

  • Frost: White with light blue “frost” edging along the petal margins
  • Violet Wing: Front lower petals are white edged with lavender or darker purples, backed with dark burgundy or purple on upper rear petals
  • Yellow: Bright lemony or sunny yellow blooms
  • White: Bright white petals with slight color variations for elegant interest

Growing Tips

Easy to grow, Cool Wave Pansy is much more vigorous than ever. Choose plants with an overall deep green color with plenty of buds for the best results and fastest blooming. Plant in fertile soil where the plant will receive 6 hours of daily sunlight. Use a liquid fertilizer when planting and fertilize every two weeks to maintain vigor and color. Replace with wave petunias in the summer when it becomes too warm for pansies.

Cool Wave Pansy grows well in rain or cold. In fact, it easily overwinters in many areas. This three-season performer may be planted for fall color, overwinter, and then perk up again in early spring providing an early punch of pizzazz. If it becomes too leggy, just cut back the foliage back to 3 inches tall and fertilize. In a couple of weeks, it will be smiling up at you.

When planting in containers, consider the flower and container colors to maximize the visual effect. Interplant with other textures and colors for an eclectic rainbow of vibrance. When planting in fall, add spring blooming bulbs, as they’ll easily grow through the pansies to create a riot of spring color. Spiky grasses provide a tall and contrasting effect to the pansy’s trailing tendrils, especially in larger containers.

With so many stunning options and new colors to embrace, there’s sure to be a Cool Wave Pansy perfect for all your flower planting desires!

pansy_3

pansy_1

Acid-Loving Plants

Soil pH is a critical factor for gardening success. Some plants thrive in neutral soil while other plants prefer soil on the acidic side. The difference lies in the plant’s ability to use nutrients present in the soil. For plants that prefer an acidic soil a critical nutrient is iron. Iron is most easily available in soil with a pH of around 5.5. Without iron, acid-loving plants will turn yellow and suffer stunted growth.

What is pH?

pH stands for “potential hydrogen ions” and is the measure of acidity or alkalinity. The pH scale ranges from 0 to 14. pH less than 7 indicates acidity, pH greater than 7 indicates alkalinity and 7 is neutral. Soil pH directly affects nutrient availability. Plants grown in soil with pH above or below their optimum range will be less vigorous, more susceptible to disease, less able to fight off insects and may even be weakened to the point of death.

How pH Affects Plants

Nutrients necessary for healthy plants are divided into three categories: primary nutrients, secondary nutrients and micronutrients. Primary nutrients are (N) nitrogen, (P) phosphorus and (K) potassium. These nutrients requited in the largest amounts for plant growth and health and are represented in numbers found on every fertilizer container (for example, 20-20-20). (Ca) Calcium, (Mg) magnesium and (S) sulfur are secondary nutrients that are also required by plants. These are required in lesser amounts than N-P-K but are also essential for good plant growth. (Zn) zinc and (Mn) manganese are examples of micronutrients. Micronutrients are required by plants in very small amounts. Most secondary and micronutrient deficiencies are easily corrected by keeping the soil at the optimum pH value.

Because pH directly affects nutrient availability, acid-loving plants develop iron chlorosis when grown in soils that are too alkaline. Iron chlorosis is often misdiagnosed as a nitrogen deficiency because both present with a yellowing leaf. Chlorosis of young leaves is the first symptom of iron deficiency, while a magnesium deficiency results in yellowing of older leaves first. Nitrogen-deficient plants will not only have yellow leaves but also weak stems, underdeveloped leaves and reduced root development.

What Causes Soil Acidity

Soil pH is influenced by the kind of parent material from which the soil was formed. Rainfall also affects pH. As water passes through soil it leaches basic nutrients such as calcium and magnesium from the soil, which are replaced with acidic elements such as aluminum and iron. For this reason, soils formed under high rainfall conditions are more acidic than those formed under dry conditions. Caused by pollution, acid rain also has an influence in soil pH. The application of fertilizers containing ammonium or urea speed up the rate at which acidity develops in the soil. The decomposition of organic matter will also add to soil acidity.

Testing and Adjusting Soil pH

Before planting any plant it is best to know the optimum pH range that plant will thrive in and the pH of the soil in which you will be planting. “The right plant in the right place” is always the best policy. Purchase a pH test kit or meter. These are available at most garden centers, or you may also send a soil sample to your county extension service. This will give you a more in-depth soil analysis along with the pH. To correct soil pH it is imperative that you know the soil pH before you attempt to change it.

Adding shredded pine needles, composted oak leaves or peat moss will assist in lowering soil pH over time. A quicker fix is the addition of two materials commonly used for this purpose: aluminum sulfate or garden sulfur. Aluminum sulfate will change the soil pH instantly because the aluminum produces the acidity as soon as it dissolves in the soil. Garden sulfur requires some time for the conversion to sulfuric acid with the aid of soil bacteria. The conversion rate is based on the fineness of the sulfur, the amount of soil moisture, soil temperature and the presence of bacteria. Based on these factors, the conversion rate of sulfur may be very slow and could take several months for a full effect. Acidifiers should be worked into the soil after application to be effective. Do not apply to leaf surface or burn may result. Read and abide by manufacturer instructions when applying.

Keep in mind that it takes time to alter soil pH and your soil will tend to revert to its old pH over time, necessitating repeated treatment. Attempting to change soil pH too quickly may shock and kill a plant. A good rule of thumb is to adjust no more than one point per season. It is also important to note that fertilizers recommended for acid-loving plants do not assist in adjusting the soil pH, but are instead formulated to work well in already acidic soil.

Acid-Loving Trees and Shrubs

Want to add gorgeous plants to your landscape without worrying about acidic soil? These plants thrive in soils with low pH, or come in for an expert consultation on your soil’s pH and what plants will do best in your garden, flowerbeds and landscape.

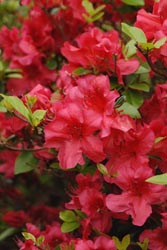
  • Azalea
  • Bayberry
  • Blueberry
  • Camelia
  • Cranberry
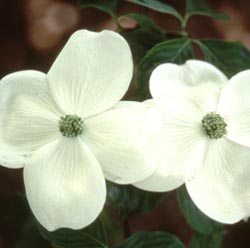
  • Dogwood
  • Fir
  • Fothergilla
  • Gardenia
  • Heath
  • Heather
  • Hemlock
  • Holly
  • Hydrangea
  • Itea
  • Leucothoe
  • Magnolia
  • Mountain Ash
  • Mountain Laurel
  • Oak
  • Pieris
  • Pine
  • Raspberry
  • Rhododendron
  • Spruce
  • White Cedar
acidlovingplant3

acidlovingplant

acidlovingplant2

Spring Lawn Renovation

Spring is the ideal time to spruce up your lawn. After a long winter, you can easily see where any bald, bare or thin patches exist, as well as where weeds or fungus may be taking over the lawn. Fortunately, there are easy ways to set your lawn to rights!

Seeding

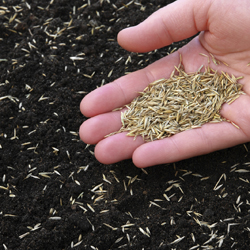
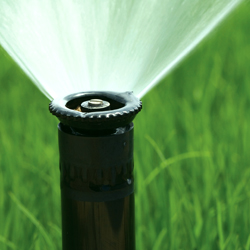
If you are planning to seed a new lawn or overseed an existing lawn, it is best to seed as early as possible. It is important to get seed germinated and growing before trees begin to leaf out, when the trees will be usurping more of the soil’s moisture and nutrition and new leaves will block sunlight from the grass seed. This is especially true in more heavily shaded areas. Keep the area moist at all times until the roots of grass seed become established, then you can gradually decrease the frequency of watering. The new grass can be mowed when it reaches a height of about three inches.

Rejuvenating a Weak Lawn

Your lawn cannot live without air, water and nutrients, but decaying material matted down between grass blades can smother even the healthiest-looking lawn. This decaying material is called thatch, and when a thick layer of thatch builds up, water and fertilizer may run off instead of penetrating the soil. Aerating and dethatching can help rejuvenate a lawn by restoring passageways to the soil. Late spring is an excellent time to dethatch cool-season grasses. Thatching rakes can be used, or you can use a metal rake to remove thatch by hand.

Adusting pH 

The pH of your soil has a direct impact on the health of your lawn. Test your soil to determine the pH (simple kits are available to do this). We recommend a small handful of soil taken from a depth of 3 inches to get the most accurate reading. At a pH of 6.8-7.0 nutrients are most readily available to turf grasses, and beneficial microorganisms are more active to decompose thatch and keep the soil structure healthy. If your pH is too low or too high, consider amending the soil as needed to help bring it to a more desirable level.

Crabgrass Control

On established lawns that you are not overseeding, apply a fertilizer with crabgrass control in early to mid-April. Straight Team products can be applied with separate fertilizers like Espoma Organic 18-8-6 or similar fertilizers. Reapply Team in early to mid-June for the second germination of crabgrass. Remember, crabgrass seeds start to germinate when the soil temperature reaches 50-58 degrees. Use corn gluten as an organic alternative for crabgrass control on an established lawn.
On newly seeded lawns and those seeded in late fall or during the winter months, use a starter fertilizer with crabgrass control. You will need to reapply in four weeks or however the manufacturer’s instructions indicate. Proper applications will keep your new lawn crabgrass-free.

Maintaining your lawn at a higher level, 4 inches, throughout the growing season will allow you to control crabgrass without the use of chemicals. Taller grass will shade out the crabgrass seed preventing it from germinating.

Insect Controls

An early season application of Merit or a similar insecticide will provide effective white grub control for the growing season. This preventative method tends to give better results than applying insecticides when you notice damage as it then may be too late. If you have routinely had problems with other insects, opt for products specifically targeted for those pests to ensure effective control.

A lot goes into having a lush, healthy lawn, but if you take the appropriate steps to rejuvenate your lawn in spring, you’ll be rewarded with thick, healthy, resilient turf to enjoy from early spring until snow flies again.

spring_lawn_3

spring_lawn_1

Grass sprinkler

Problems With Your Compost Pile? Fix Them!

A compost pile should be part of every gardener’s yard, since it adds so many benefits for recycling and providing organic material in the garden. There are times, however, when it can be tricky to keep a compost pile in peak condition and breaking down material most efficiently. If you encounter any of these common problems, you can easily correct them and keep your compost pile at its best.

  • Pile is Too Dry
    Without adequate moisture, beneficial microorganisms cease to function and decomposition stops, turning a compost pile into a clumpy mess that does not decay into usable organic material. Keep the pile moist at all times, but not overly wet. A dampness like a squeezed sponge is ideal. It may be necessary to use a hose to water your pile occasionally, or a tarp or piece of plastic over the top of the pile can help keep moisture in the pile instead of evaporating.
  • Foul Odor
    A stinky compost pile is no gardener’s friend, and over-watering the pile will compact the material. When air space is decreased, the pile becomes anaerobic, resulting in an unpleasant odor. Turn the pile frequently to increase aeration and add larger pieces of dry, porous, carbon-rich material such as wood chips or straw to absorb excess water and improve air circulation.
  • Pile is Cool
    Check all the items required for a hot, quickly-decomposing pile: carbon, nitrogen, air and water. Correct any deficiencies. Another issue may be that a pile that is too small will have difficulty insulating itself. Increase the size of your compost pile by adding more material so it can generate sufficient heat from decomposition to keep itself warm.
  • Pests in the Pile
    While insects and worms are welcome helpers in a compost pile, a poor pile may also be attracting mice, rats, squirrels, raccoons and other wildlife. This usually means that the wrong material was used for composting. Never add meat, fish, bones, dairy products or oily food to the compost pile, all of which can have strong odors that will attract unwanted wildlife. Similarly, no human, cat or dog manure should be added to the pile. Avoid adding weed plants or diseased plants as well, since those weed seeds or disease spores could be transmitted to your garden or landscape when the compost is spread.
  • Poor C/N Ratio
    When planning the optimum conditions for compost decomposition, the standard recommendation is 3-to-1; three parts carbon to one part nitrogen. Carbon-based material is brown and nitrogen-based material is usually, but not always, green. Chopping or shredding additions to the compost pile will speed up the decomposition and help keep the pile balanced.

    The best materials to add to your compost pile include…

    Brown Material (Carbon-Based)
    – Dried, dead Leaves
    – Shredded paper, including newspaper
    – Wood ash
    – Sawdust
    – Eggshells
    – Chipped brush and wood chips
    – Straw and twigs

    Green Material (Nitrogen)
    – Grass clippings and sod scraps
    – Vegetable and fruit peels, scraps and rinds
    – Disease and insect-free plant material, such as clippings and prunings
    – Horse, cow, chicken and rabbit manure (herbivores)
    – Coffee grounds and used coffee filters
    – Used tea bags
    – Used potting soil

No matter what issues your compost pile may be having, problems are easy to correct and you can quickly adjust your pile to be productive and efficient. Before you know it, you’ll have plenty of rich, nutritious compost to nurture your garden and landscape all year long.

compost-1

compost-3

compost-2

Bringing Your Tropical Plants Indoors for the Winter

As the summer comes to an end and autumn approaches, the days get shorter and cooler temperatures signal the time to ready your plants for winter. How can you protect your treasured tropicals from winter damage?

Overwintering Tropical Plants

Don’t wait until frost warnings or freezes occur to bring tropical plants inside, especially since these plants are more susceptible to dropping temperatures. Try to have all of your plants acclimated to the new indoor environment by the end of October. Avoid the temptation to move your tropicals back outside if it suddenly gets warm, because they will have to re-acclimate when you bring them back inside again. With a little extra care even exotic hibiscus can be over-wintered inside the house.

First, it’s a good idea to prune approximately one-eighth to one-fourth off the total height of the plant’s foliage. This helps reduce the shock that the plant receives with the change of conditions when bringing them indoors. Check the plants for signs of insects and treat them with insecticidal soap or pyrethrin spray as well as a systemic insecticide that will provide protection for up to six weeks.

Position indoor tropical plants in a very bright location that receives no less than 6 hours of light per day. If the winter is very cloudy, supplement your plants with an artificial light source. Be sure the room is warm, but avoid putting the plants too close to a heating vent, which can dry them out drastically.

Because they are tropical plants, they will need good humidity which can be achieved by using a humidity tray. Use a saucer that is at least 3-4 inches larger than the pot and fill it with an inch of stones. Pour water over the stones until they are half covered, then place the pot on top of the stones. The humidity immediately around the plant will be increased, but avoid setting the pot directly in any water, which can lead to fungus and rotting. Grouping several plants close together can also help them preserve humidity for more luxuriant growth.

Fertilizing should be continued throughout the winter, but at a rate of once per week. You will find the plant will not utilize as much water in the winter because its growth has slowed. Generally, plants should be watered every 4-7 days depending on location, pot size, soil type and plant type.

If you have any questions about winter care of your plants, our staff will be glad to help you keep your tropicals in good condition all winter long.

tropical-2

tropical-1

Get Started Composting

Fall is an excellent time to start a compost pile with all of the leaves falling, and if you develop compost now, you will have a rich source of organic material for your garden and flowerbeds in spring. Getting started with compost is fairly simple if you keep in mind the following…

  • Size Matters
    Smaller particles break down faster than larger chunks. Shredding or mulching garden wastes will help speed up the process and develop usable compost faster. Chop up larger pieces of household materials before adding them to your compost pile to speed up their decomposition.
  • Take a Turn for the Better
    Turning helps aerate the pile and shifts outer parts closer to the center where they can heat and decompose more effectively. A well-mixed pile will also have better consistency and more evenly distributed nutrients. Use a pitchfork, spade or rake to gently turn your pile periodically, such as once every 1-2 weeks or whenever you add a large amount of new material to the pile.
  • Know What to Compost
    Materials that can be composted are sod, grass clippings, leaves, hay, straw, manure, chopped corncobs, corn stalks, sawdust, shredded newspaper, wood ashes, hedge clippings and many kinds of plant refuse from the garden. Some household waste, such as coffee grounds, banana peels, eggshells and vegetable peelings are also ideal for a compost pile and will reduce the trash you accumulate.
  • Avoid Unwanted Materials
    Materials to avoid composting are large amounts of weeds, grease, fat, meat scraps and bones, cheese, coal ashes, diseased plants, cut weeds and charcoal. These materials do not decompose readily and can create poor quality compost. For example, meat, grease or dairy products in your compost will begin to smell strongly, which could attract rats, raccoons or other unwanted visitors. Diseased plants or weeds can survive in a compost pile, contaminating your garden when you add the compost to the soil in spring.
  • Cover as Needed
    Covering your compost pile with a tarp or large piece of carpet can help preserve the heat and moisture essential to promote appropriate decomposition. The cover can also keep the pile from freezing or getting too wet in winter conditions, and it can easily be removed to add new material or turn the pile as needed.

Before you toss out your next bag of trash, check for compost material and start your pile today! Your garden will thank you tomorrow.

compost_2compost_1

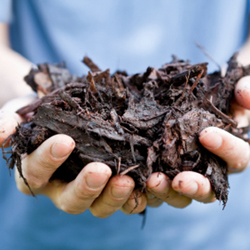
Gardener Holding Tree Bark Mulch

Over-Wintering Container Plants Outdoors

All containerized plants that are considered hardy in your zone can spend the winter outdoors, but you do need to take a little special care to keep them safe and comfortable as temperatures drop. Despite their hardiness, winter is still a challenging season, but it is possible to keep your container plants healthy until the days grow longer and warmer again.

Options to Overwinter Your Container Plants

  • In the late summer or fall, removed the plant from its container and plant it in the ground while the soil is still warm. Another method is to bury the pot, with the plant in it, in the garden and remove the pot following spring. Both of these methods will help insulate the root system, preventing it from freezing solid and killing the root system.
  • Place containerized plants in an unheated garage but along a heated wall. This is an excellent method for very large pots or porous pots that tend to break apart from the constant cycle of freezing and thawing, and so would not be very hardy if buried. For extra root protection and insulation, wrap the pots in plastic bubble wrap or wrap an old comforter or quilt around the pots.
  • Group pots together along the sunny side of your house or shed. If this area is windy, create a windscreen with stakes and burlap. Place bales of straw or hay around the perimeter of the grouping up against the pots to further protect plants from cold winds. Fill in areas between pots with mulch, shredded leaves, grass clippings or hay for insulation. Lay evergreen branches or place a layer of mulch on top of the pots for additional protection.
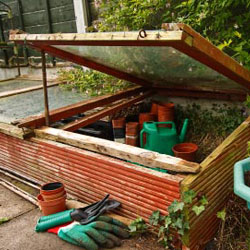
  • Use a cold frame covered with plastic or Reemay fabric to help control temperatures and reduce light as well, helping plants stay dormant in winter. It will still be necessary to use mulch, shredded leaves or hay around and in-between pots for insulation. Rodent control, such as Havahart traps, may be necessary when using this method.

Watering Container Plants in Winter

Make sure that plants go into the winter with moist soil so that there is water available to plant roots. Check soil moisture occasionally, never allowing it to dry completely. It is also a very good idea to spray needled and broadleaf evergreens with an anti-desiccant. This acts as a protective coating for plant foliage and stems as it helps them retain moisture.

With just a little care and forethought, you can easily prepare containers for winter without risking the plants and arrangements you have so carefully cultivated.

over-winter-2
over-winter-1

Devil’s Darning Needle

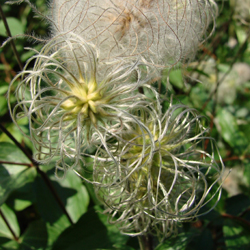
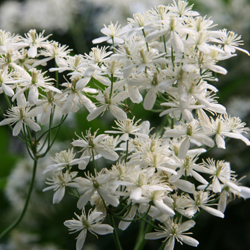
Fall is here and after hiding inside in the cool comfort of our air conditioning through the hottest, driest, buggiest time of the year, our interest in revisiting the outdoors is renewed. Reemerging from self-imposed exile into the garden, it is pure joy and a relief to witness the tenacity of late season bloomers that have had to bear, with no assistance or relief, the dog days of summer. One such plant, reliable and prolific, is Clematis virginiana, better known as Devil’s Darning Needle.

Devil’s Darning Needle – also called Devil’s Hair, Love Vine and Woodbine – is a North American native vine. It is very similar in habit and appearance to the Japanese native, Sweet Autumn Clematis (C. terniflora) that most of us are familiar with, yet Devil’s Darning Needle is not as aggressive and can be better controlled in the landscape. C. virginiana is a vigorous, twining, deciduous vine, growing about 15 feet in a season. This plant is in best form when planted next to a supporting structure such as an arbor, trellis, fence, tree or shrub. Its quick growth rate makes this an excellent choice where quick privacy is needed, such as along a fence, shielding a patio or forming a wall around a deck. If unsupported, it will sprawl along the ground.

What makes this plant so alluring is its annual, overwhelming display of 1 and 1/4 inch, highly fragrant, star-shaped, pure white blossoms produced in billowy masses in the fall followed by ornamental, silvery, plume-like seed heads. Both flowers and seed heads work well in floral arrangements. Either in the yard or in a vase, this prolific bloomer will not disappoint.

Devil’s Darning Needle is easy to grow. As a low-maintenance vine, it is rarely troubled by pests or disease. It performs well in moist to wet soil of average fertility and prefers full sun to part shade, although it will thrive and bloom in considerable shade. Supplemental watering may be necessary during times of drought. In late winter or early spring, prune C. virginiana back hard to about one foot from the ground to encourage spring growth, but be certain to leave at least two strong buds on each stem. During the growing season, monitor the vine if it is growing through a shrub to make certain that the shrub is not being overwhelmed. No special care is needed to trim it back to control size, but it can be pruned for shape if desired.

Devil’s Darning Needle can be an amazing addition to your landscape, and its late summer and early fall beauty is sure to delight just when other plants begin to fade.

clematis_250x250_2clematis_250x250_1

Fall-Blooming Camellias

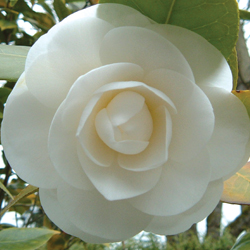
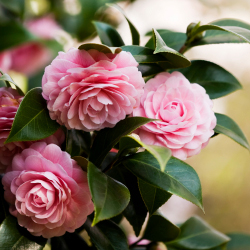
We love camellias! An Asian native and an old southern standby, they are now a favorite in the northern states as well. In recent years, new varieties have been developed for their increased cold hardiness, giving northern gardeners even more opportunities to enjoy these charming beauties. Blooming in October, November and even into early December, fall-blooming camellias provide an abundance of colorful showy blooms that can now be enjoyed in colder climates.

Camellias do best in rich, moist, well-drained, acidic (5.5-6.5 pH) soil. Plant camellias in a location where they will be protected from the drying winter sun and wind or else the delicate blooms may suffer. Because these shrubs are shallow-rooted, they should be planted no deeper than they are planted in the pot that you purchase them in. Apply 3-4 inches of mulch to the root zone to keep soil moist and control weeds. Compost added to the soil can also help provide suitable nutrition to keep these plants healthy. Water camellias first when newly planted and frequently during times of low rainfall – a drip system can be a great option to keep these shrubs suitably moist. Fertilize in the spring with a fertilizer specified for acid-loving plants. If purchasing and planting camellias in the fall, be sure to give them a little extra TLC to help them through their first couple of winters and they will reward you with their beauty for years to come.

To help you choose the most beautiful fall-blooming camellias for your landscape, consider these attractive cultivar options!

  • Ashton’s Pride: Lavender-pink, single flowers with yellow centers
  • Ashton’s Snow: Creamy white flowers in semi-double blooms
  • Long Island Pink: Single blooms with bright pink colors and ruffled petals
  • Mason Farm: Pink, single flowers with a white tinge
  • Northern Exposure: Pink buds that open to single white, papery flowers
  • Winter’s Darling: Deep pink flowers with anemone shapes
  • Winter’s Fancy: Deep rich pink, semi-double blooms
  • Winter’s Interlude: Light pink blooms with anemone shapes and peachy centers
  • Winter’s Joy: Bright bold pink, semi-double blooms
  • Winter’s Star: Single lavender-pink pale blooms with yellow centers
  • Winter’s Water Lily: Elegant white flowers with a formal double shape

No matter which fall-blooming camellia you choose, if you give it the proper care, it will love you right back with abundant growth and stunning blooms that bring an air of southern charm and hospitality to your yard.

camellia_250x250_3camellia_250x250_1

camellia_250x250_2

Minor Bulbs: Perfect Partners for Early Spring Color

A garden stroll in the early spring offers a great deal of promise but generally little color. You can rectify this with a little planning and planting this fall to ensure bright spring blooms to enjoy.

What Is a “Minor” Bulb?

Often passed over at the garden center for showy, larger-flowering bulbs, minor spring bulbs give the garden a head start on spring, extending the season by blooming as early as February and March. These beautifully blossomed seasonal gems are short in stature and produce daintier flowers but, when planted en masse, make as powerful a statement as any daffodil, tulip or hyacinth planting.

Chionodoxa, Muscari, Eranthis, Galanthus and other minor bulbs are planted at the same time as tulips, daffodils and hyacinths, and in the same way, although not so deeply. The general rule of thumb is to plant bulbs three times as deep as the bulb is high. Your soil should be well drained so the bulbs do not rot. Don’t forget to include bone meal in the planting hole for strong growth in the spring.

Minor bulbs make perfect partners for all of your other traditional spring-flowering bulbs. Their size makes them suitable for rock gardens and walkways, as well as filling in spaces between other spring bloomers. They also naturalize well and will help fill in any gaps in a spring garden or wildflower lawn.

Top Minor Bulbs

There are many lovely bulbs with smaller, stunning spring flowers to choose from. Some of the most popular and versatile options include…

  • Chionodoxa (Glory of the Snow): Small, 1 inch white-centered blue or pink flowers appear on leafless stems. Plant in large groups in front of early blooming shrubs or naturalize in the lawn. When grown in shade, blooms last several weeks. Plants grow 4-10 inches tall.
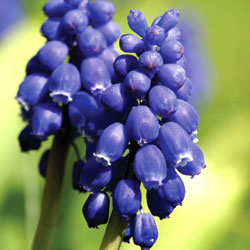
  • Muscari (Grape Hyacinths): Offering the rare and cherished blue color in the garden, Muscari have small spherical blossoms bunched into triangular clusters on top of delicate 6-9 inch stems. Grape hyacinths are available in various shades of blue, purple and white.
  • Eranthis (Winter Aconite): A relative to the buttercup, Eranthis unfolds bright yellow, honey-scented blossoms that can carpet the chilly ground and bring life to a dormant rock garden. Plants grow 2-4 inches tall.
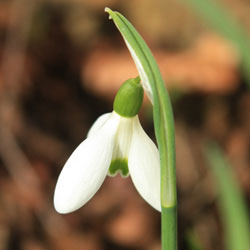
  • Galanthus (Snowdrops): The cold is no deterrent to the bell-shaped frosty white flowers of Galanthus. This plant thrives in light shade under leafless trees and is well suited to random planting amidst tough grass. Shorter varieties grow to 4 inches while giant snowdrops reach 10 inches.
  • Leucojum (Giant Snowflake): Drooping bells of white or pink flowers with green tips adorn this frost-hardy 4 inch plant.
  • Pushkinia (Striped Squill): The white flowers of this plant look light blue because of the blue stripes on the petals. Plant in sun or partial shade in well-drained soil. Striped Squill grows 6-8 inches tall.
  • Scilla (Spanish Squill): This late spring-flowering plant has multiple stems with up to 12 bells on each stem. Colors are blue, pink and white. Scilla needs adequate moisture in the flowering season as it grows to 10-12″ in height. Plant in full sun or partial shade.
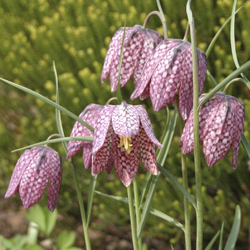
  • Frittilaria meleagris (Checkered Lily): This small Frittilaria grows to only 9 inches tall compared to its sibling Frittilaria imperalis (Crown Imperial) that grows to a height of 3 feet. The checkered lily’s name is derived from its checker-patterned petals.

Any of these smaller, less obtrusive bulbs can make a great early spring statement in your garden or landscape, bringing it to life long before most spring blooms are at their peak.

snowdrop_250x250

checkeredlily_250x250_3

hyacinth_250x250

Kale, the Super Food

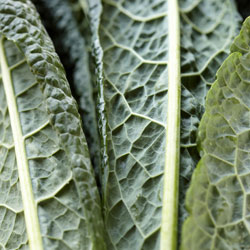
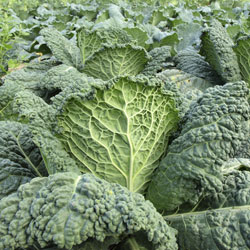
Did you know kale is a super food? Kale belongs to the same family as cabbage, broccoli and Brussels sprouts. It is a rich source of vitamins C, A, & B6, and is loaded with manganese, calcium, copper and potassium, with no fat or cholesterol. Add it to your garden for a healthy harvest!

Planting

In the fall, set out transplants or sow kale seeds about 6-8 weeks before first frost in deep rich soil. Kale will need at least 6 hours of sun per day. Enrich your planting soil with plenty of compost. Planting kale in nutritious soil will promote faster plant growth and thus provide a tender, richer crop. Soil pH should be between 6.5 and 6.8. Sow seeds roughly one-half inch deep and thin seedlings to 8-12 inches apart to provide adequate air circulation. When thinning kale shoots, however, bear in mind that larger spacing will produce larger plants, larger plants produce larger leaves and larger leaves are generally tougher. Keep soil moist and mulch to control weeds. Water when planting and during dry spells.

Harvesting

Don’t worry about frost harming your harvest, a light frost will only enhance the sweetness of kale. Harvest the outer leaves of kale as they are needed for salads and recipes. Young tender leaves will grow from the center of the plant. Use the young leaves for salads and keep older leaves for cooking, which will help tenderize those larger leaves. Kale will continue to produce throughout fall in the warmer sections of our area. In low lying areas or where it is colder, use floating row covers or low tunnels to extend the life of your kale. Kale will bolt (elongate) and flower in the spring. This signifies the end, and it is time to pull it up and compost the remaining plant.

Cooking

Kale may be used fresh or frozen. It may be steamed or stir-fried, or used in soups, stews, omelets and casseroles. It is a tasty base for salads or can be added to sandwiches. It may be used in recipes as a replacement for spinach and collard greens. It even makes fantastic chips!

Kale Chips

  • Preheat oven to 425 degrees Fahrenheit.
  • Clean Kale and spin dry. Remove all the tough stems.
  • Drizzle about 8 cups of leaves with one tablespoon of olive oil and toss to coat.
  • Place Kale leaves in a single layer on a parchment lined cookie sheet.
  • Bake for 10-15 minutes or until leaves are crisp but not scorched.
  • Remove from oven and immediately sprinkle with generous amount of flaky sea salt.
  • Devour!

With so many tasty options for kale and so many nutritional benefits from this super food, there’s no excuse not to add this easy-to-grow dietary wonder to your garden!

kale_close_250x250

kale_250x250

Fairy Garden Magic

Do you think your tiny balcony terrace means you can’t have a grand garden? Are you looking for a clever and imaginative way to introduce a child to the world of plants? Have you ever dreamed of your own “McGregor’s Garden?” One of the newest gardening trends can do all these and a whole lot more!

Start planning…and playing…in your fairy garden!

About Fairy Gardens

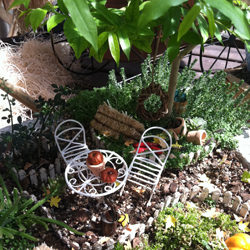
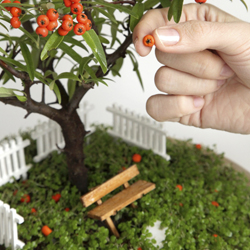
One of the newest gardening trends, fairy gardening is the new-and-improved miniature gardening of yesteryear with all sorts of new products, idea books and plants. Despite their small size, the themes, designs and creativity of these tiny garden spaces is boundless. Any container, nearly any type of plant and any type of design can add a bit of garden magic even to a tiny space. Go small and have fun.

Designing a Fairy Garden

You can create your fairy garden just about anywhere. For portability, consider a pot, basin or terrarium. Or, for a more rustic appeal, plant an old lunchbox, garden bucket or child’s wagon. Old shoes, a stack of broken pots, a rusty wheelbarrow or a concrete bird bath are other great planting options.

Fairy gardens can be positioned anywhere. A smaller design can be a fun centerpiece to patio furniture, or it can be part of an entryway display. To heighten the intrigue, find a secret place in your own garden to lure the garden fairies. Between tree roots, beside a water feature or in a grove under flowering shrubs… The possibilities are endless.

Design the overall look of your fairy garden just as you would a larger garden. What is its theme? Is it a fantasyland for unicorns? A gnome family farm? A replica of your own big house? It can be anything you imagine. Consider tiers, layers and depth as well to create a truly impactful scene in your miniature fairy world.

If you’re having trouble coming up with an idea, visit your garden center to check out all the products. If you need some inspiration, our Enchanted Garden products by Grassland Road will get you started. Whimsical and charming, they’ll help you create your own mini-fantasy scene. From arbors and benches to umbrellas and miniature tools, the possibilities are amazing. If you’re not sure your resident garden fairies will understand your invitation, you can always buy a mannequin fairy to entice them to share the fun.

This visit also sets the mind whirling with ideas for plant materials. Consider the mixture of colors, textures, shapes, and scents… in miniature. Tiny groundcovers such as moss or creeping thyme create beautiful “lawns.” Pebbles become paths. Sand creates shores. Twigs make houses, fences and other structures. What can you do with a small pinecone or acorn? How can you recreate a Disney-type pumpkin carriage?

Creativity knows no limits, and the fairies will love you for it!

minigarden_250x250_3

gomegarden_250x250

minigarden_250x250

Healthy Soil: Winter Cover Crops

It’s fall and our annual and vegetable gardens are winding down for the season. Now is the time to invest a little extra time and effort to prepare your soil for next year. Whether your garden is large or small, all annual planting beds will benefit from the addition of a winter cover crop.

Benefits of Cover Crops

A cover crop is a fast-growing, low-maintenance crop that can be used to protect your garden and landscaping beds in fall and winter. Depending on the crop you choose, it can provide many benefits to your garden, including…

  • Stabilizing soil and preventing erosion
  • Adding organic matter back into the soil to nurture later crops
  • Adding nutrients to the soil that have been used by previous crops
  • Suppressing disease that can wither new crops even before they start
  • Repressing weeds that will take over a garden
  • Improving soil structure with aeration and better drainage
  • Encouraging beneficial insects that will help later crops

Recommended Cover Crops

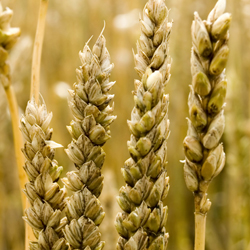
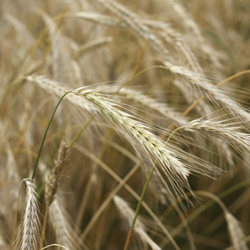
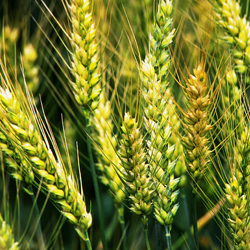
Different cover crops work best in different areas, and the climate, soil type and growing season will help determine which cover crops will work best for your gardening needs. The most popular recommended cover crops for our area are oats, rye and wheat.

  • Oats
    Sow 6-8 weeks before the first hard frost. Planted early, oats will provide a quick covering with the added benefit of providing an early planting time for next spring’s crops. Oats are not winter hardy, but they will grow in the fall and die in the winter, leaving behind nutritious mulch that will easily decompose when incorporated into the soil in the spring. This is a great cover crop choice for low- or no-till gardens. Sow at 2 lbs. per 1,000 sq. ft. for the best coverage.
  • Winter Rye
    Sow 2-4 weeks before the first hard frost. This is a good choice for gardeners who have late season crops and don’t want to cut off that last harvest. If hardened off before frost arrives, winter rye will continue to grow over the winter. Rye is a vigorous grower and can be difficult to turn in the spring, so bear that in mind depending on what crops you will be planting in spring. Sow at 3-4 lbs. per 1000 sq. ft. for appropriate coverage.
  • Winter Wheat
    Sow 2-4 weeks before the first hard frost. Wheat will cover quickly but is not as aggressive as winter rye. Winter wheat is also leafier, making it easier than winter rye to turn into the soil in the spring. Sow at 3 lbs. per 1000 sq. ft. to provide good coverage.

Cornell University provides a tool to assist you in choosing the correct cover crop for your situation. (http://covercrops.cals.cornell.edu/decision-tool.php)

Planting Cover Crops

Before planting a cover crop, clean out garden beds, removing all roots and plant material. Compost all plant matter that is not diseased. Broadcast seed evenly and cover with soil. Water thoroughly when planting and when necessary during dry periods. In the spring, till or fork oats into the planting bed and you are ready to plant. For winter rye and wheat, mow or chop tops 4 weeks before planting leaving cut cover crop on top to dry. Till or fork dried wheat and rye into the bed before planting.

With the appropriate cover crop, you can protect your garden’s most valuable asset – the soil – and be sure it is ready for spring planting.

oats_250x250

rye_250x250

wheat_250x250

Winter Pond Prep Checklist

Your pond can be an attractive and valuable focal point of your landscaping, but it can also be a delicate one. As winter approaches, certain steps should be taken to ensure plant and fish survival so your pond will still be at its best next spring.

  1. Clean Out Debris
    Use a netted scooper, a rake, your hands and, if possible, a pond vacuum to clean out pond debris. Rotting vegetation produces gas under winter ice that can be fatal to fish, frogs or other aquatic wildlife. This is also a good time to reduce any mud coverage over the pond’s bottom.
  2. Trim Pond Plants
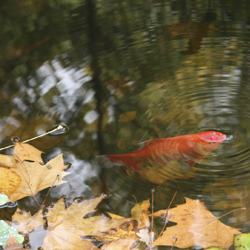
    Trim and move hardy pond plants to the deep end of the pond (minimum 18” depth) to prevent them from freezing. Cut their vegetative growth back to about one inch above the soil line. Extra foliage will be more delicate and could rot over the winter. Especially be sure to trim any foliage that is already broken, wilting or damaged.
  3. Remove Tropical Plants
    Tropical plants or any delicate vegetation should be removed from the pond and placed in a basement or garage where they will not freeze. Keep plants moist throughout the fall and winter months until it is time to return them to the pond.
  4. Disassemble Summer Equipment
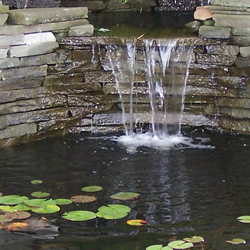
    Remove and clean the pond pump and waterfall or fountain feature (if applicable). Store them inside for the winter. See your maintenance guidelines for proper storage recommendations to keep the equipment in peak condition.
  5. Clean Pond Filter
    Thoroughly clean the pond filter and inspect it for any damage. If necessary, repair or replace the filter.
  6. Change Fish Diet
    Feed fish with spring/autumn food mixtures to provide good nutrition for their slowing metabolism. Stop feeding them completely when temperatures drop consistently below 50 degrees Fahrenheit. Avoid overfeeding, which would contribute to excess debris and decay in the pond over the winter.
  7. Set Up Pond Heater
    If needed, set up your pond heater for winter use. Test the equipment to be sure it is functioning properly and make any repairs or adjustments as needed.
  8. Cover the Pond
    Cover your pond with netting, screening or a shade cloth to minimize debris that will fall into the water throughout the winter. Secure the perimeter with sod staples or rocks to prevent the covering from blowing away. This will make spring cleanup and restarting your pond much easier.
  9. Relax until spring!
    Your pond will be ready for warmer temperatures when you are.

pond_250x250_2

pond_250x250_1

The Great Squirrel Battle for the Bulbs

Autumn is the catalog time of year, when gardeners devour and drool over the spring-blooming bulb catalogs, eagerly fantasizing about next year’s flowerbeds. We picture drifts of crocus and gaily swaying tulips, lush daffodils and glorious hyacinths. Snowdrops, irises, daylilies… Ah, the garden will be great this next spring.

Then we remember last spring – hours of labor and dozens of bulbs meticulously planted, but only one or two emerged to flaunt their blooms. What happened?

Squirrels and Bulbs

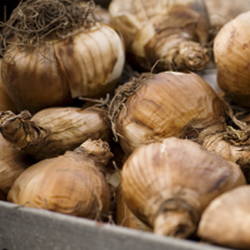
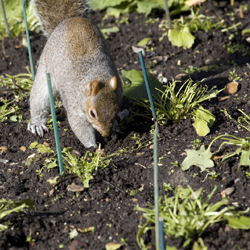
Squirrels like flower bulbs just as much as gardeners, but unfortunately not for their beauty. From the looks of the remains – chewed remnants, dug up holes, battered foliage – those bulbs became expensive squirrel food. Fortunately, if you want to plant daffodils, alliums, scilla, hyacinths, squills or fritillaria, your bulbs should be safe. Generally, squirrels don’t eat these. But how can you protect the bulbs that make the tastiest squirrel treats?

Keeping Squirrels Out of the Flowerbeds

Go ahead and order your bulbs. While you’re waiting for delivery, decide which of the three basic methods you will use to prevent the squirrel attacks. A small investment of time and materials will protect your bulbs.

  1. Mesh Barriers
    Wire mesh is the best protection to keep squirrels away from bulbs. Dig the hole for several bulbs, make a “cage” using mesh around the bulbs and fill in the soil. If the squirrels dig, the mesh will prevent them from eating the bulbs. You may also plant the bulbs as usual and place a layer of mesh on the soil. You’ll have to secure it to keep it in place then cover with mulch. Be sure the mesh layer is wide enough so squirrels cannot easily dig around the sides to reach the bulbs.
  1. Repellants
    Garden centers sell many different squirrel repellants, and deer repellants also repel squirrels. Some gardeners swear to the effective use of red pepper flakes mixed in the soil around, and over, the bulbs. Many squirrels don’t like spicy tastes, but pepper flakes may need to be replaced after heavy spring rains to be the most effective.
  1. Sharp Gravel
    Adding sharp gravel to the soil around and over the bulbs also deters squirrels from digging. Not only do they not like the feel of the gravel on their sensitive paws, but the gravel – which is heavier than dirt or mulch – is more difficult to move, so the bulbs stay safer.

There is another option to keep squirrels away from bulbs without completely discouraging their visits. If you can’t beat ’em, join ’em – because squirrels look for the easiest food sources, a squirrel feeding station stocked with corn and peanuts may be just the thing to keep the squirrels from looking for your buried treasures!

squirreldigging_250x250

bulbs_250x250

Glorifying Garden Gloves

Many gardeners believe garden gloves are easy to do without. Those of us who love gardening enjoy the feel of soil running through our fingers, and we don’t mind the line of dirt under our fingernails. We prefer to not have anything impede the dexterity needed to sow small seeds or pinch a plant, and we like the textures of the plants we cultivate. We would rather spend our budgeted gardening dollars on the latest herbaceous sensation rather than unnecessary gloves, and, frankly, nobody likes sweaty hands.

Why Gloves Matter

Despite the prejudice against covering our hands, gloves are the single most important piece of garden clothing that a person should own. In addition to the fact that they come in every color and pattern under the sun, making them an attractive and matching accessory to your garden wardrobe, garden gloves provide many benefits, such as…

  • Improving your grip on tools, minimizing accidental drops that can damage expensive tools.
  • Keeping hands warm in cold weather so we can garden in comfort even in early spring or late fall.
  • Keeping hands dry in wet weather to prevent skin irritation and problems that could limit our gardening.
  • Preventing contact with animal waste that may carry bacteria, mites or other pests that could harbor diseases.
  • Helping avert calluses and blisters that can make even simple gardening tasks painful and unpleasant.
  • Protecting hands from cuts, splinters and thorn pricks from aggressive plants so we aren’t limited in our gardening choices.
  • Preventing contact with poisonous plant oils that cause rashes and allergic dermatitis.
  • Keeping nails clean and help prevent nail breakage so our hands can be as beautiful as our garden.
  • Protecting from soil borne fungal and bacterial infections that could be spread around the garden easily.

With so many great reasons to use garden gloves, which ones should you choose?

Selecting Gloves

Gardening gloves come in an almost limitless array of colors, styles and patterns. Features may include…

  • Different types of fabric or weave densities that affect air circulation to keep hands cool and comfortable
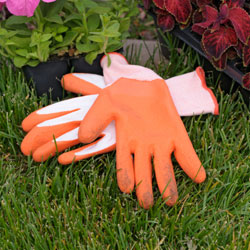
  • Anti-slip grips or rubber palms and fingers for excellent traction in all types of gardening conditions
  • Broad, wide cuffs for an easy fit or snug, form-fitting cuffs for a secure fit that won’t let in any dirt or debris
  • Different sizes and proportions to suit men, women and children

With so many gloves on the market there’s a style available for every garden chore, season, weather condition, hand size and preference. Check out our selection today. We are happy to help you choose a pair or two that work best for you and your gardening needs.

gloves_250x250

Eastern North American Native Ferns

Ferns are magnificent, whether in the wild or under cultivation. Among the oldest plants on earth, ferns can be traced back to the Coal Age, over 300 million years ago. Today, ferns are one of the most overlooked and under-utilized perennials in the garden.

Types of Ferns

Eastern North American native ferns are available in a vast array of sizes, forms and textures and thrive in a variety of habitats. Many ferns present a combination of both fertile (with spores) and infertile (without spores) fronds that add an additional element of interest to their growth and texture. Some ferns prefer sun, some shade. Some prefer moist soil, some dry. Some spread quickly, some stay put. Some are easy to grow, some… not so much. You get the picture – the versatility of this plant group ensures a selection for every gardener and every garden situation.

With so many ferns to choose from, which is right for your landscaping needs? Consider the following popular varieties, or come in to consult with our landscaping experts to find the perfect fern to complement your landscape.

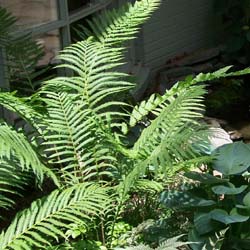
  • Cinnamon Fern (Osmunda cinnamomea) – Grows 24-36 inches tall. The stiff fertile fronds appear in spring, first green and later turning cinnamon-brown. The plant grows neatly in a symmetrical clump. This fern does best in a shady site with moist soil.
  • Christmas Fern (Polystichum acrostichoides) – This is one of the few evergreen ferns native to the eastern United States. The leathery fronds of this durable fern reach 18 inches in height. The Christmas fern is not an aggressive spreader and is easy to nurture in a moist, shady garden.
  • Hay-Scented Fern (Dennstaedtia punctilobula) – This lovely fern grows to about two feet in height and spreads rapidly. Spreading may be controlled by pulling out some of the growth in spring. This fern does best in full sun to partial shade and will tolerate somewhat hot, dry sites. Hay-scented fern produces lightly scented, apple-green, lacy fronds that add delicacy to the garden.
  • Interrupted Fern (Osmunda claytoniana) – This fern is unusual for its sterile, three-foot tall fronds that have brown spore cases in the middle of the frond with pale green leaflets both above and below. Interrupted fern grows best in a shady site with moist soil. This fern will tolerate more light and drier soil than most, and it is remarkably easy to grow.
  • Lady Fern (Athyrium filix-femina) – This fern can reach up to 36 inches, although its height can be quite variable. This easy-to-grow fern is an excellent choice for beginners. In the spring, Lady ferns produce a hearty flush of reddish-green growth. This is when the plant is most beautiful. Lady fern does best in shady conditions with slightly acid, moist to wet soil.
  • Maidenhair Fern (Adiantum pedatum) – At 18 inches tall, this specimen is the daintiest of the Eastern North American native ferns. The fan-like leaves are borne on delicate, curving, black stems. This fern does best in filtered light and well-drained, cool soil. This fern spreads fairly slowly.
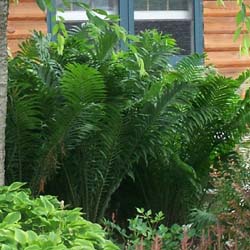
  • Ostrich Fern (Matteuccia struthiopteris) – This fern produces light-green, gracefully arching fronds that reach up to 40 inches or more. This is an excellent choice for background planting. Underground runners extend in all directions and will colonize large areas, so it needs abundant space. The early spring fiddleheads are edible. Ostrich fern does best in sun to partial shade and moist soil. It is native to marshy areas.
  • Royal Fern (Osmunda regalis) – This fern forms a three-foot, vase-shaped clump of bright green fronds. Light brown spores are borne on the top of the fertile fronds. Royal fern does best in shade or sun and a moist organic soil.
  • Sensitive Fern (Onoclea sensibilis) – This fern makes a spectacular ground cover of 18 inch high, light green fronds. The fronds emerge in the spring tinged pinkish-purple until maturity. This fern prefers average moisture and part sun.

Growing Veggies in Containers

Do you dream of a delicious, homegrown harvest but don’t have the land to use? No longer should a shortage of garden space prevent you from growing your own fresh vegetables. As long as you have a sunny location you can have your own mini-farm on your porch, patio, deck, balcony, roof-top or doorstep!

Why Use Containers?

The benefits of growing containerized vegetables go beyond the issue of space. There are plenty of other compelling reasons to plant your veggies in pots, including…

  1. Vegetables are amazingly ornamental and can be just as decorative as any other container plants or flowers.
  2. There are fewer problems with pests such as groundhogs, deer and rabbits and soil borne diseases.
  3. The soil in pots warms up more quickly in the spring allowing for earlier planting and an extended growing season.
  4. Less bending, squatting and kneeling is required for gardeners with limited mobility.

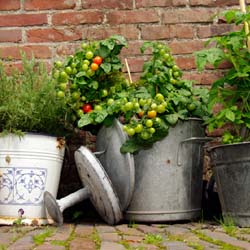
Vegetables can be grown in any vessel that can hold soil, has adequate drainage and is large enough to hold a plant. There are endless options available on the market or you may recycle items that you already have as long as they meet these requirements. Use your imagination – try a wheelbarrow, wine barrel or just a plastic bin, and you’re ready to plant!

Best Vegetables for Containers

While all veggies can be grown in containers, some are better suited than others. Plants that grow particularly large, that sprawl or that must be grown in large numbers to ensure an adequate yield may take more effort and careful site planning with an adequate container. Similarly, vining plants need not be avoided. Trellis these plants up against a wall or fence or allow them to cascade down from a taller pot or a container placed up high like on a stone wall. For smaller selections, a hanging basket or window box may be used. Many sprawling and vining vegetables are now available by seed in dwarf, compact or bush varieties. These are bred specifically for small spaces and containers and are worth seeking out.

Tips for Container Vegetable Gardens

Growing vegetables in containers does take some unique thought and isn’t quite the same as planting in a traditional garden. When planning your delicious container garden, consider…

  • Containers: Size matters when planting in containers. The bigger the container, the more soil it can hold. More soil more and more moisture means less watering. Take note that porous containers like terra cotta dry out more quickly and will therefore require more frequent watering.
  • Soil: When planting, choose a good quality potting mix. Soil from the ground may contain insects or disease or may be too heavy. Add an all-purpose balanced fertilizer at time of planting. It is also good idea to mix water absorbing polymers into the soil. These granules can hold up to 400 times their weight in water and help reduce watering from 30-50 percent.
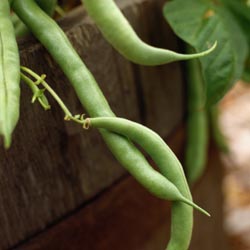
  • Plants: Some of the vegetables that you select may be directly seeded into your container; these would include peas, beans, radishes and corn. With most vegetables you may wish to transplant seedlings into your container, either home-grown or garden center purchased. You will generally find a wider selection of vegetable varieties and unique options available in seed as opposed to purchased seedlings, if you want to use your containers experimentally.
  • Supports: Supports should be placed at time of planting for large or vining plants. This will ensure the young plants are not disturbed or damaged with supports added at a later time. If the supports are outside the container, however, they can be added only when they are needed.
  • Location: Your vegetables will require at least 6 hours of direct sun a day. If this is not possible you may try placing your pots on dollies or carts and moving them to a sunnier location as the sun moves throughout the day. Note that good air circulation is important for disease control.
  • Watering: Test soil frequently for water to make sure that you keep it evenly moist. Water the soil, not the plants, to avoid the spread of disease. Check soil moisture more frequently during the summer months when evaporation is faster. Mulching your containers with salt hay or grass clippings will help keep soil cool during the summer months and reduce the frequency of watering. If possible, a drip system can be a great option for keeping containers watered.
  • Fertilization: Fertilizer leaches through pots quickly. Fertilize containerized vegetables at least once a week with a water soluble fertilizer. Always be careful to follow the directions on the fertilizer package and follow the recommended rate. Too much fertilizer may burn or kill your plants, but too little will result in undernourished, underperforming plants.

With appropriate care that caters to the needs of containers, your small-scale vegetable garden can be just as lush and productive as any larger, more intensive space, and you’ll soon have a bountiful harvest to enjoy.

Tremendous Turf

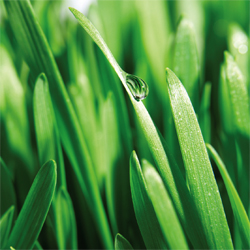
The benefits of turf grass as a ground cover are numerous and often undeclared or overlooked. In recent years, turf has gotten a bad reputation due to the belief that a beautiful lawn requires a lot of hard work and overuse of dangerous chemicals. This is a misconception and the benefits of turf can far outweigh the concerns, particularly when you care for your turf properly and responsibly.

The following is a list of the many advantages that our lawns provide. This list was provided by and may be found, along with other helpful turf information, at www.TheLawnInstitute.org.

Environmental Benefits

  • Cools the Air
  • Produces Oxygen
  • Filters Air & Reduces Pollution
  • Captures & Suppresses Dust
  • Recharges & Filters Groundwater Supply
  • Reduces Storm Water Runoff
  • Controls Soil Erosion
  • Retains and Sequesters Carbon
  • Assists Decomposition of Pollutants
  • Restores Soil Quality

Community & Human Health Benefits

  • Enhances Community Pride & Social Harmony
  • Offers a Natural Playing Surface for Recreation
  • Provides a Safe Surface & Reduces Injuries
  • Promotes Outdoor Activity & Exercise
  • Improves Physical & Mental Health
  • Relieves Stress
  • Lowers Allergy-Related Problems
  • Dissipates Heat & Cools the Environment
  • Reduces Glare
  • Diminishes Noise Pollution
  • Minimizes Nuisance Pests
  • Compliments Overall Landscaping
  • Preserves Natural Wildlife Habitat

Economic Benefits

  • Increases Property Values
  • Reduces Home Cooling Costs
  • Provides a Low-Cost Ground Cover
  • Serves as a Fire Barrier
  • Improves Visibility & Deters Crime
  • Boosts Human Productivity

With so many benefits to healthy, luxurious turf, won’t you give your lawn another chance? We can help – from suggestions for revitalizing a weak lawn to proper mowing tips to fighting weeds and pests, plus all the tools, seed, fertilizers and amendments you need to improve your lawn – our experts can help you make the most of every square inch of your turf!

Pruning Evergreens

When choosing an evergreen for your landscape project, it is always best to select a plant that will not outgrow its designated space, crowding out nearby plants or distorting its own shape without enough room to shine. Proper research can help you choose – you should know the ultimate height, width and growth rate of your selection before committing to what may be one of the more costly additions to your landscape. Always choose naturally slow-growing or dwarf conifers for small spaces, bearing in mind how nearby plants and structures may limit available space over time. Fortunately, just about every genus of evergreen is available in a dwarf variety.

That being said, what if the mistake has already been made? We’ve all made it! It is easy to fall in love with a sweet little plant in the garden center that, within a few years in the ground, looks like it could swallow your house. Fear not, there are ways to rectify the situation with proper pruning.

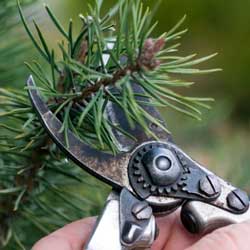
You will need the right tools to accomplish the job:

  • Loppers
  • Bypass pruners
  • Safety goggles
  • Leather gloves

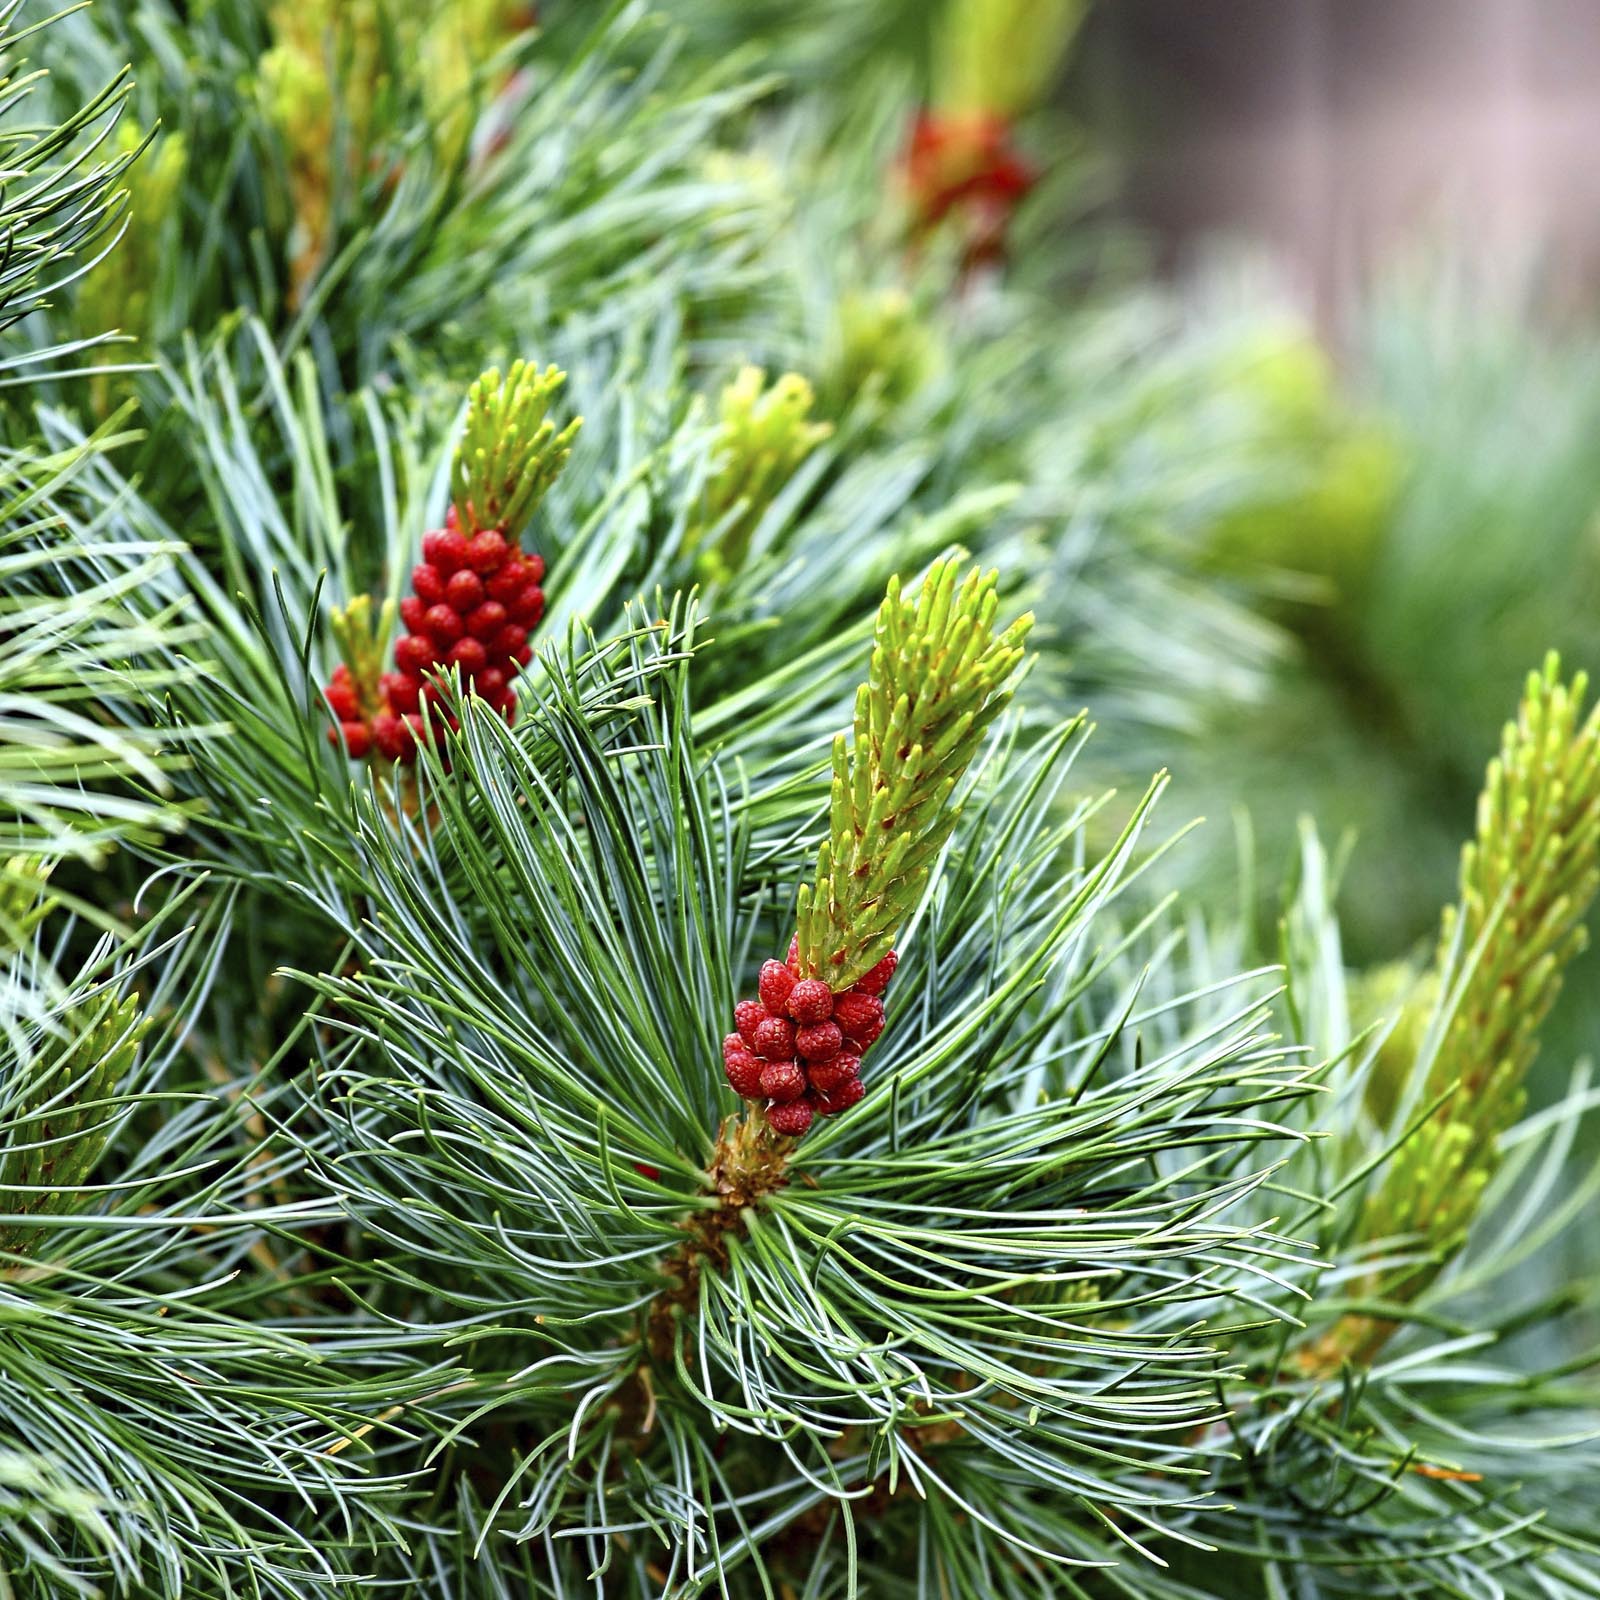
Pruning should begin in the early spring before the plant’s soft new growth hardens off. Take a close look at your evergreen to determine its branching habit. Pine, spruce and fir trees all have layers of branches that are whorled around the trunk. Arborvitae, juniper, yew and false cypress have limbs that are produced randomly along the trunk.

Conifers with a random branching habit are able to grow new limbs from old, foliage-bearing wood. You may prune this type of evergreen back to this older wood to encourage a more compactly branched habit and keep size down, or to create the desired shape. Whorled branching evergreens are pruned differently, however. They have new growth called “candles” at the tip of their branches, and they really do look like candles with lighter coloration. To promote a more densely branched, compact habit, pinch the candles back by up to half their length before the needles harden off. Never cut into the older wood below the candle, as this type of evergreen does not have dormant buds on the stem that will become new growth. Pruning into old wood will leave a hole in your plant and distort its overall appearance.

As always, we are eager to assist you with selecting the proper plant for any landscape project you undertake and to advise you on proper pruning to keep it healthy and beautiful for many years.

prune2Pine with Cones natural backgroundprune1